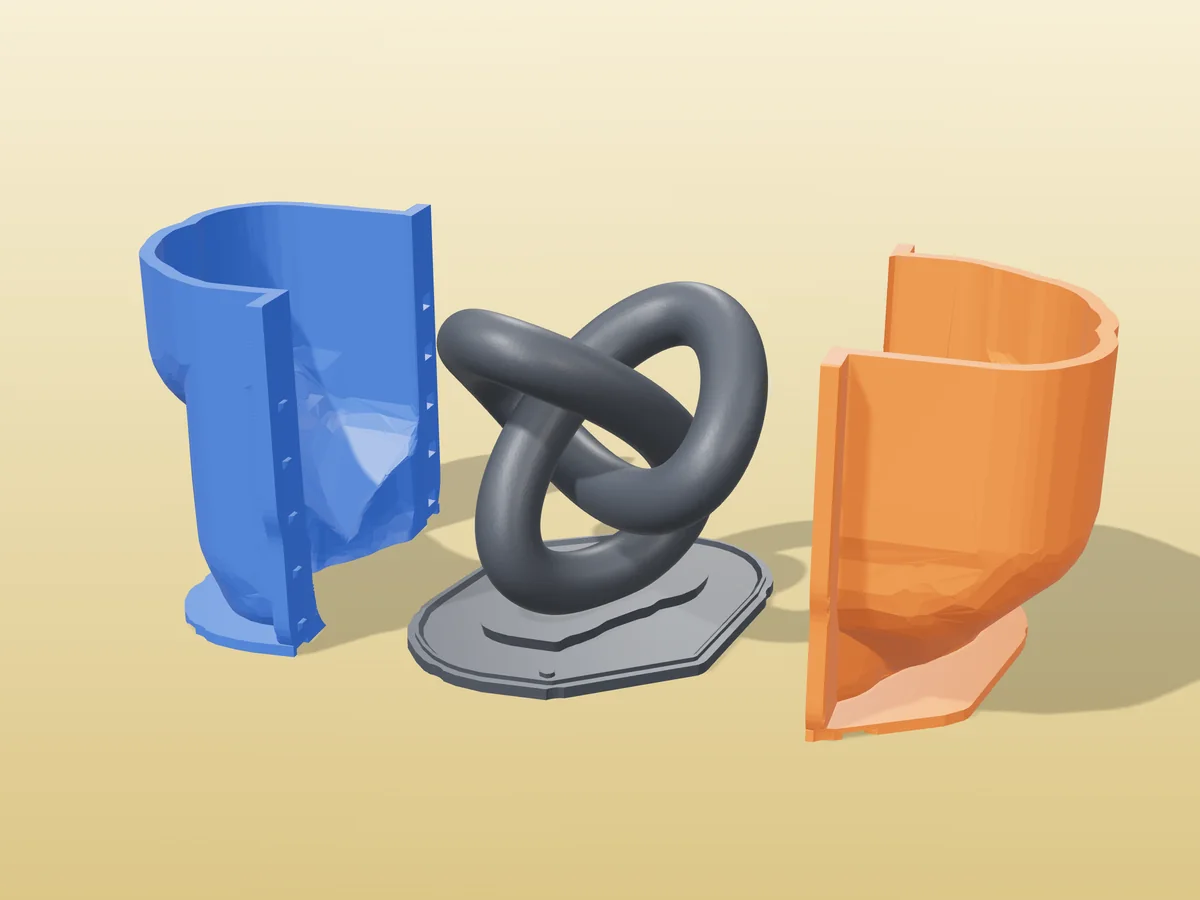
A trefoil knot candle standing about 79 mm tall: one thick rope that loops through itself three times. A knot has no way to split into two rigid halves at all, since every lobe passes through another, so this is a silicone shape by definition.
Made with the hugging-shell mode of our silicone mold maker, the mode the site's own mold advisor recommends for it. Print the base with the knot fused onto it and a two-part shell, pour about 416 ml of silicone around it, and cut the cured silicone open along one side to take the knot out. The flexible mold then closes back up around each new candle.
The strands are kept at least 3.5 mm apart where they pass, so silicone fills every gap and the candle comes out as one clean rope. The zip carries every printed part, the knot master as its own STL, the tool's own print-settings sheet and a recipe file.
Shown as a 3D render of the printed mold parts pulled apart around the master, not a photo.
What you need
- About 452 ml of silicone (mix it in one batch)
- About 85 g of wax per candle: each cast is 94 ml
- A sharp craft knife to cut the silicone open once
- Steel binder clips, tape or a hot glue gun
How to cast it
- Print the base, which has the master already fused onto it, and the two shell halves. No supports.
- Stand the shell halves on the base around the master and hold the seams shut with steel binder clips. The seats for them are built into the shell.
- Tape the outside seams or run a bead of hot glue along them, because silicone finds every gap.
- Mix 452 ml of silicone in one batch, pour it into the open top in a thin stream, and fill level with the rim.
- Once it has cured, unclip the shell and lift it off. Cut the silicone open along one outer side, just deep enough to reach the knot, and ease the knot out.
- To cast, close the cut, set the silicone back in the shell to keep its shape, and pour through the opening the base left.
| Cast material | Candle wax |
|---|---|
| Total print time | 16 h 37 min |
| Printed parts | 3 |
| Size (W x D x H) | 90 x 97 x 94 mm |
| Filament | ~200 g |
| Layer height | 0.2 mm |
| Infill | 15% |
| Supports | Not needed |
| Printer | Sliced with PrusaSlicer 2.7.2: 0.4 mm nozzle, 0.2 mm layers, 3 walls, 15% infill, MK3-class speeds. These parts only hold liquid silicone while it cures, so PLA is fine. No supports. |
| Download | ZIP: 3 printed parts (STL) + candle master (STL) + print sheet + recipe |
| Added | 2026-09-24 |
Pro early access until October 24, 2026, then free with any account.
Free for personal use. Selling the pieces you cast needs a commercial licence (Pro or Founder); passing on the file itself is not permitted on any plan. Full terms.
Made with the free silicone mold maker generator. Upload your own model and get the same kind of mold built around it, in your browser.
New to casting? Read the silicone mold maker guide.