How to 3D print a bust or bobblehead of yourself from a photo
This guide was drafted with AI assistance.
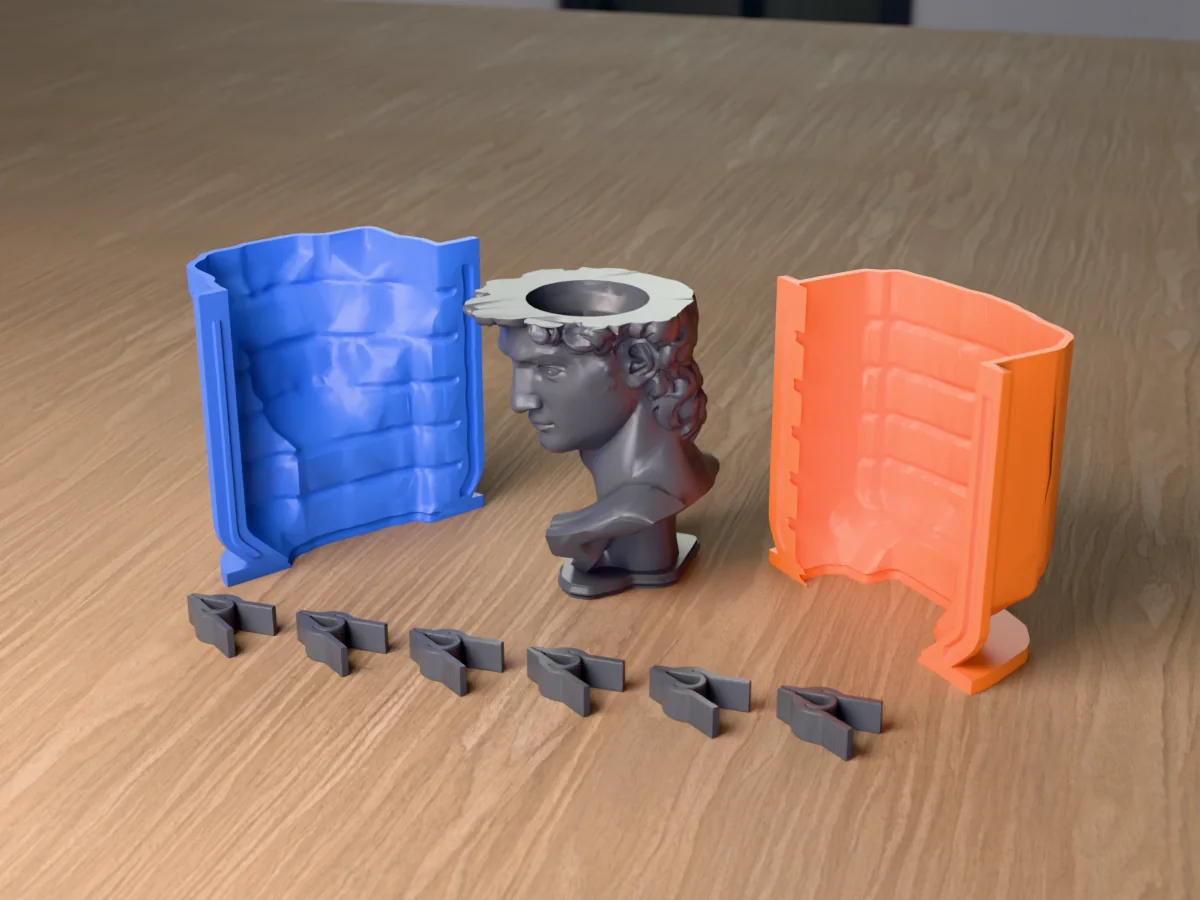
Take one sharp, front-facing photo in even light, turn it into a 3D head with an AI photo-to-3D tool, check the mesh (size, one closed piece, nothing thinner than about 1 mm), then either cut it flat for a bust or split it at the neck for a bobblehead. Print it upright at 0.12 mm layers with supports only under the chin and nose. Expect several hours of printing for a 100 mm bust. To make many, use the bust as the master for a silicone mold and cast it in wax, soap or resin.
What you need
- A photo of one person or one pet. A phone photo is enough.
- An AI photo-to-3D tool. Several exist; we compare them in STLFLIX AI alternatives. Bambu Lab's PrintU and Make My Statue, PrintPal's face and pet generators, Meshy, STLAI and the Meshcast head generator all take a single photo.
- A printer. Any FDM printer with a 0.4 mm nozzle handles a desk-sized bust. For heads under about 50 mm, a 0.2 mm nozzle or a resin printer keeps the face.
- A slicer such as Bambu Studio, OrcaSlicer, PrusaSlicer or Cura.
1. Pick the photo
The photo decides more of the result than the tool does. Two minutes choosing the right one saves several paid retries.
| Works well | Causes trouble |
|---|---|
| Face to the camera, or turned slightly | A profile or a strong three-quarter view: the far side gets invented |
| Soft, even light (outdoors in shade, a window) | Hard shadows across the face: they get sculpted in as dents |
| The whole head in frame, hair included | Hair or chin cut off by the edge of the picture |
| Eyes open, glasses off (or clear glasses) | Sunglasses and reflections, which turn into blobs |
| One subject, plain background | Two faces, hands touching the face, a busy background |
| Pets: both eyes and both ears visible | A pet mid-movement or half hidden in a blanket |
2. Turn it into a 3D head
Most tools work in two stages. First an image model redraws your photo as a clean "sculpture" picture in the style you pick (realistic, cartoon, chibi or big head). Then an image-to-3D model builds a mesh from that picture.
Approve the picture before the 3D
If the tool shows you the 2D picture first, judge the likeness there: hairline, eye shape, the smile, glasses, a beard. The 3D model copies that picture closely, so a wrong picture becomes a wrong head. Retrying the picture is usually free or cheap; retrying the 3D is the expensive step.
Choose the style for the print, not just the look
Realistic heads carry fine detail that needs a bigger print or a resin printer. Cartoon and big-head styles have smoother, larger forms that print cleanly at keychain size and come out of a mold more easily.
3. Check the mesh before you slice
AI meshes look finished on screen and still fail on the printer. Open the file in your slicer and check four things:
- Size. Some tools export at a fixed or arbitrary scale. Set the height you want in millimetres.
- One closed piece. Holes in the mesh and loose floating bits (a strand of hair, an earring) confuse the slicer. Most slicers offer a repair on import; accept it.
- Thin parts. At the size you print, ears, nose tips and hair strands should be at least about 1 mm thick, or they break off or vanish.
- File size. A model with millions of triangles slices slowly and gains nothing on a printer. If the file is huge, reduce it to a few hundred thousand triangles.
4. Make it a bust, or split it for a bobblehead
A bust
Cut the model flat under the neck or across the chest so it stands, and give it a base: a round or square plinth, or a plinth with a name on the front. In most slicers this is a plane cut plus a simple cylinder or box, or you can do it in any 3D editor. A wider base (about the width of the head) keeps a tall bust from tipping.
A bobblehead
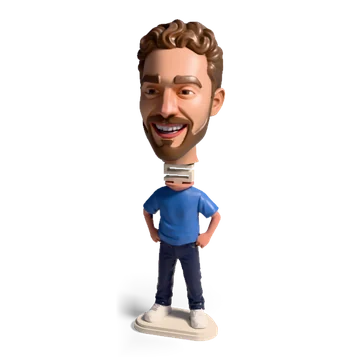
A bobblehead is two prints: the head, and a body or plinth it rests on. The joint between them is what makes it nod:
- Peg and loose socket. A peg on the body sits in a socket in the head that is noticeably wider than the peg, so the head rocks on it. No hardware, prints in one go.
- Spring. A short compression spring (the one from a ballpoint pen works) glued into a hole in the neck and a hole in the head. More bounce, one extra part.
Split the head at the narrowest point of the neck. A heavy head on a small pivot bobbles best, so print the head with more infill than the body.
| Object | Good size | Note |
|---|---|---|
| Keychain | 30 to 40 mm | Big-head or cartoon styles; realistic detail is lost at this size |
| Fridge magnet | 50 to 60 mm | Cut the back flat, leave a pocket for the magnet disc |
| Desk bust | 70 to 120 mm | The sweet spot for a 0.4 mm nozzle |
| Bobblehead | 80 to 140 mm in total | Head about half the total height |
| Candle or soap master | 60 to 100 mm | Bigger means a lot more silicone and wax |
5. Print settings for faces
| Setting | Value | Why |
|---|---|---|
| Orientation | Upright, face forward | Layer lines run across the face like contour lines and read as skin, not stripes |
| Layer height | 0.12 mm (0.08 mm under 50 mm) | The nose and lips are where the steps show |
| Walls | 3 | Thin features stay solid |
| Infill | 10 to 15 %, gyroid | Enough for a display piece; more for a bobble head |
| Supports | Tree supports, only under the chin, nose and ears | Everywhere else a head supports itself |
| Material | Matte PLA | Hides layer lines better than silk or glossy filament |
A resin printer gives the finest faces at any size, at the cost of washing and curing. For a small head that will be molded, resin's smooth surface also means less sanding before the mold.
6. Colour it, or cast it
Colour
- Paint a one-colour print. A grey or white print with acrylics looks best for realistic faces. Prime first.
- Print in several filaments. Use a tool that exports a 3MF with colours assigned, or paint the faces in your slicer. Keep it to four or five colours: skin, hair, eyes, lips and one for the clothes or base. More colours mostly add purge waste and print time; see cutting colour purge waste.
Cast it as a candle, soap or resin figure
One print makes one head. A mold of it makes as many as you like, and a face candle or a head-shaped soap is a gift few people can buy. The bust is the master:
- Make sure the bust has a flat bottom. That flat face becomes the opening you pour into.
- Open the STL in the Meshcast silicone mold maker. It builds a printed shell around the head that you pour silicone into; the contoured shell follows the head and uses less silicone than a box.
- Print the shell, assemble it around the master as the tool shows, pour platinum-cure silicone, and demold once it has cured.
- Cast wax, soap or resin in the silicone. The candle guide covers wax and wicks.
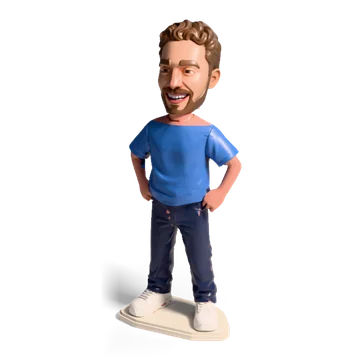
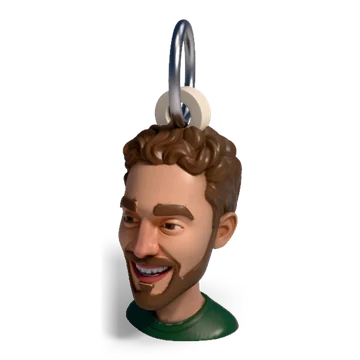
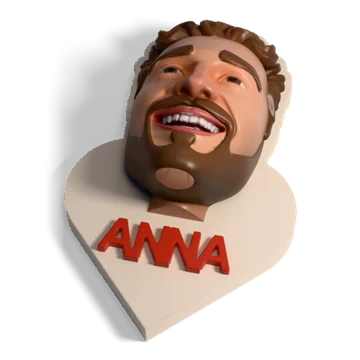
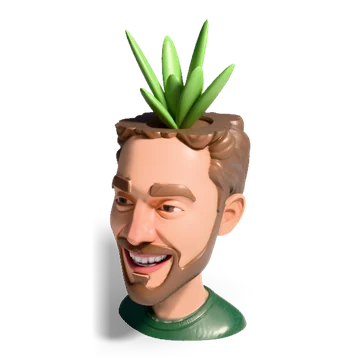
What a photo can become
Open the head generator →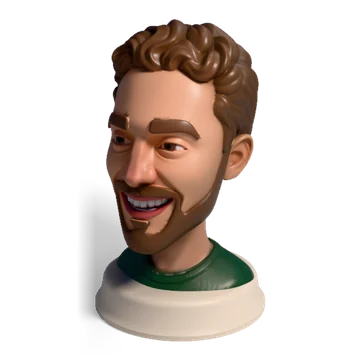
When it goes wrong
| Problem | Likely cause | Fix |
|---|---|---|
| Does not look like the person | The 2D picture was off, or the photo was angled | Retry the picture with a straighter, better-lit photo before paying for another 3D build |
| Nose or ears broke off | Features under 1 mm at that size | Print bigger, or use a smoother style |
| Face looks stripy | Layer height too big, or printed lying down | Upright, 0.12 mm layers, matte filament |
| Slicer reports errors or holes | An open or messy AI mesh | Run the slicer's repair; remove loose bits |
| Bobblehead does not move | The socket is too tight | Widen the socket, or switch to a spring |
| Bobblehead tips over | Head too heavy for the base | Wider, heavier base, or less infill in the head |
| Cast stuck in the mold | Undercuts in a rigid mold | Use silicone, or a smoother style |
Questions
Can I 3D print myself from a single photo?
Yes. AI photo-to-3D tools guess the back and sides of the head from one front photo. The face usually looks right; the back of the head and the ears are invented, so expect a likeness rather than a scan.
What size should a printed bust be?
70 to 120 mm tall for a desk bust on a 0.4 mm nozzle. Under about 50 mm, facial detail starts to disappear on FDM; use a 0.2 mm nozzle or a resin printer for small heads.
How does a 3D printed bobblehead bobble?
The head is a separate part resting on the body through a joint that lets it rock: either a peg sitting in a socket with play around it, or a small compression spring (one from a ballpoint pen works) glued into the neck and the head. A heavy head over a thin pivot bobbles best.
Can I make a candle of my own head?
Yes. Print or export the head as a bust with a flat bottom, build a silicone mold around it with a mold tool such as the Meshcast silicone mold maker, then pour wax into the silicone. Silicone is the usual choice because ears and the nose are undercuts that lock wax into a rigid mold.
Does it work for pets?
Yes, most tools accept pets. Use a photo where the animal faces the camera with both eyes and both ears visible. Long fur becomes a smooth shape; whiskers are too thin to print and are best painted or left out.
Made by meshcast.app. Print settings are starting points for a 0.4 mm nozzle FDM printer; adjust for your machine and filament. Got stuck? Email a photo and we will help you debug.