3D printed cosplay eye mesh: see out, stay hidden
This guide was drafted with AI assistance.
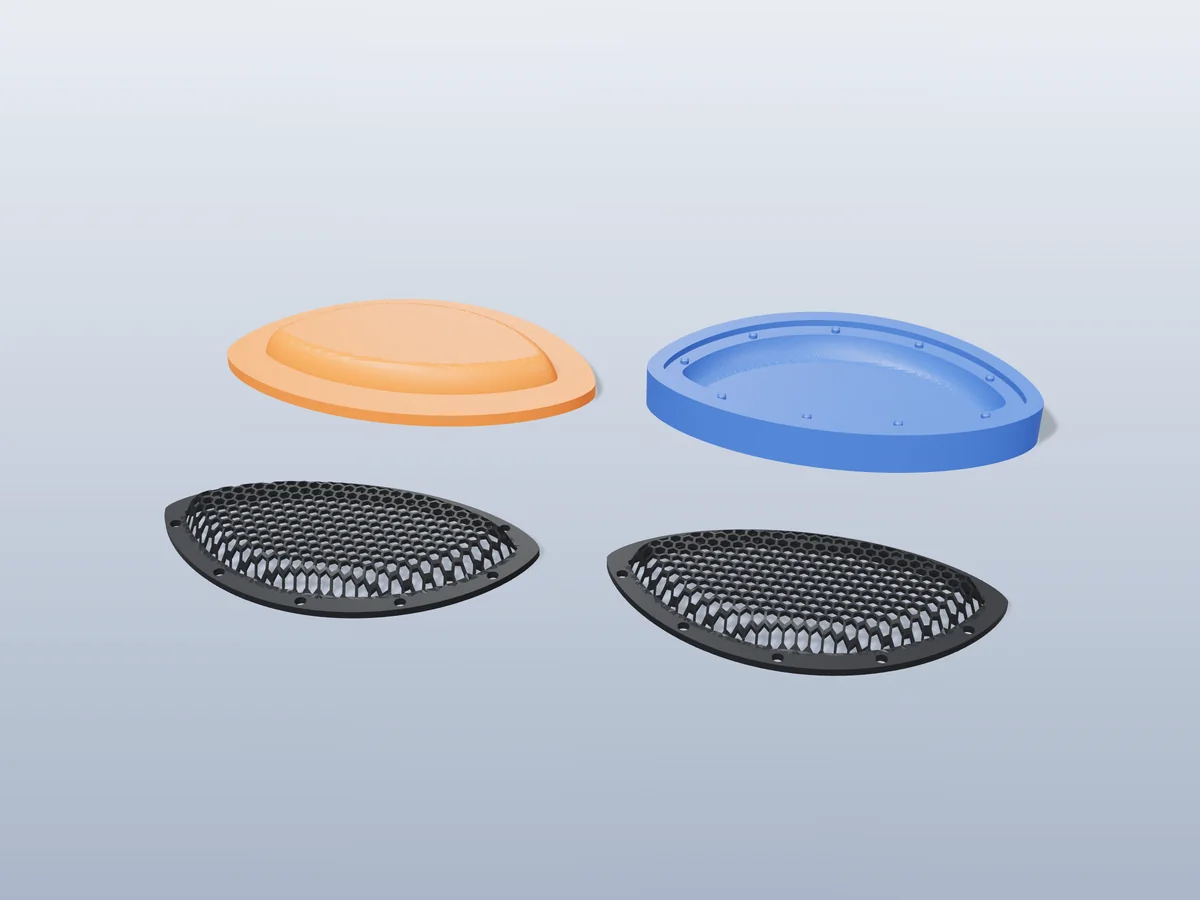
Print a fine black mesh (0.2 mm layers, 2 to 3 mm cells, struts one nozzle wide) flat, with a solid 4 to 5 mm rim around it. Warm it with a hair dryer or heat gun and press it into a curve that matches the mask, then glue the rim behind the eye hole and paint the inside of the mask black. You see out through the mesh; people outside see a solid black eye. Our cosplay eye mesh is a free file that comes with the press to curve it.
Why nobody sees in, but you see out
An eye mesh is not a one-way mirror. It works the same way a fly screen on a window does: whoever is on the bright side cannot see into the dark side. The outside of your mask is lit, the inside is dark. Someone looking at you sees lit black struts over dark gaps, and there is not enough light coming back out of those gaps to show your eyes. You, looking out, focus past the struts onto the bright room, and at that distance from your eye the struts blur into a faint haze.
Two things follow from that, and they matter more than any print setting:
- The mesh has to be dark. A white or light mesh catches the light and shows as a grid.
- The inside of the mask has to be dark too. Bare white plastic or foam around your eyes reflects light out through the mesh. Paint it matte black or line it with black fabric.
Flat mesh or curved mesh
The most downloaded mask meshes on MakerWorld, like Mask Mesh V2 and Cosplay Eye Mesh, are flat sheets: a plate printed with no top or bottom layers, so the slicer's infill becomes the mesh. You cut it to size with scissors and bend it in with some heat. It works, and for a flat or nearly flat visor it is all you need.
Most masks and helmets are curved round the eyes, though, and that is where a flat sheet struggles:
| Flat sheet, bent by hand | Mesh pressed to a curve | |
|---|---|---|
| Fit in a curved mask | Touches in the middle, gaps at the corners | Sits flush all round |
| Edge for gluing | Cut infill, a ragged edge of loose ends | A solid rim, glues along its whole length |
| Two eyes that match | Only as close as your hands | Identical, from the same press |
| Effort | Print and cut, minutes | Print a small press once, about 1.5 hours |
Print settings that keep it see-through
| Setting | Value | Why |
|---|---|---|
| Filament | Black PETG or PLA | Dark is what hides you. PETG is the easier one to curve with heat and less brittle if the mask gets knocked. |
| Layer height | 0.2 mm | A 1 mm net is five layers, plenty to hold together. |
| Cell size | 2 to 3 mm | Small enough to hide your eyes, big enough to see through. |
| Strut width | One nozzle width (0.4 to 0.5 mm) | Thinner prints broken. To see more, make the cells bigger instead. |
| Open area | 55 to 60 % | About what a bought mask mesh has. Much less and it gets dark indoors. |
| Rim | 4 to 5 mm wide, solid | This is the gluing flange, and it holds the outline while the mesh is warmed. |
A honeycomb is the stiffest pattern for its weight and the least noticeable to look through, because the eye has no long straight lines to lock onto.
Curving it to your mask
Get the eye hole's outline
Press paper against the eye hole from the inside and trace it, then draw a second line 4 to 5 mm outside the first: the rim sits inside the outline, and that band is what you glue down. Fill the outer shape in with a black marker and photograph it. Upload the photo to the mesh former: it traces the shape, builds the rim and the mesh inside it, and a small plug and cavity for exactly that shape. If an almond is close enough, the ready-made file is 80 mm wide and domed 6 mm.
Warm the mesh until it goes limp
Lay it in the cavity, flat face down. A hair dryer on its hottest setting, held close and kept moving, does it in a minute or two; a heat gun on low does it in seconds but is easy to overdo. Stop the moment it droops, before it turns glossy.
Press and hold until it is cool
Push the plug straight down and hold it for half a minute. Let go early and the mesh springs partway back. No press? Warm it and hold it against the inside of the mask itself, over the eye hole, until it cools. It follows your fingers as much as the mask, but for a gentle curve that is enough.
The physics behind all this, and which filament forms best, is in our guide to thermoforming 3D prints.
Fitting and gluing it in
- Blacken the inside first. Matte black paint, or black felt or fabric round the eyes. It is the single biggest improvement to how well the mesh hides you.
- Glue the rim, dome facing out. E6000 or a two-part epoxy for a permanent fit. Hot glue works and comes off again, but keep it on the rim: the gun is hot enough to soften a PLA mesh.
- Want it removable? Glue two small magnets to the rim and two to the mask, and the meshes pop out for cleaning or for a clear pair on stage.
- Keep it from fogging. The mesh does not fog, but anything behind it will, so skip clear lenses and give warm air a way out: an open mouth area, hidden vents low on the mask, or a small fan in a full helmet.
Questions
How does a cosplay eye mesh hide your eyes?
With light, not with the mesh. The outside of a mask is lit and the inside is dark. Someone looking in sees the lit black struts and dark gaps, and their eye cannot resolve anything in the dark behind them. You, looking out, focus past the struts onto the bright room, and the struts blur away like a fly screen.
What colour should an eye mesh be?
Black, or the darkest colour of the mask. A light mesh catches the light and becomes a visible grid from outside, and from inside it glows in your peripheral vision. If the mask has to be white around the eyes, print the mesh black anyway and paint only the rim.
What settings should I print an eye mesh with?
0.2 mm layers, a 0.4 mm nozzle, struts one extrusion wide and cells of 2 to 3 mm, which leaves 55 to 60 percent of the area open. If you need to see more, make the cells bigger rather than the struts thinner: a strut thinner than one nozzle width prints broken.
Why use a curved eye mesh instead of a flat one?
A mask is curved round the eyes, so a flat mesh only touches it in the middle and leaves gaps at the corners, or has to be forced in, which cracks the print at the edge. A mesh curved to the mask sits flush all round, so the whole rim glues down and the corners stay closed.
How do I stop the eye mesh fogging up?
The mesh itself does not fog, but anything behind it does, so do not add a lens. Give the warm air a way out: an open mouth area or a few hidden vent holes low on the mask, and a small fan in a full helmet. An anti-fog wipe on glasses underneath helps too.
Made by meshcast.app. Built a mask with it? Send a photo, I'd love to see it.