Christmas cookie cutters: design and 3D print your own
This guide was drafted with AI assistance.
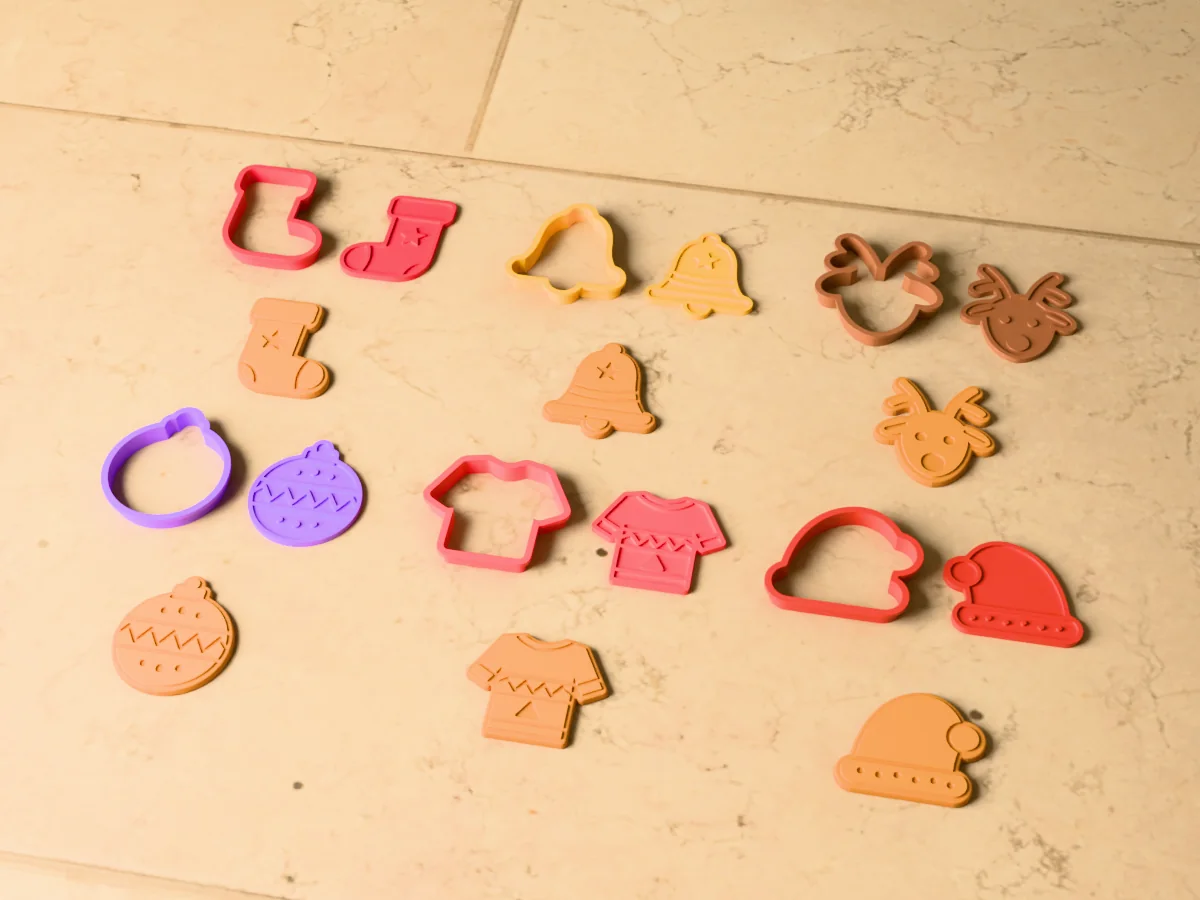
For Christmas cookie cutters you do not need CAD. Download a ready-made tree, star or gingerbread man, or open the cookie cutter generator, upload any solid black silhouette (or type a name) and download the STL. An 80 mm cutter prints in about 40 to 60 minutes from 6 to 10 g of PLA, flat top on the bed, no supports. Tick Generate stamp for a matching cookie stamp. Wash it by hand, never in the dishwasher.
Upload a tree, star or gingerbread man, or type a name, and download the cutter. Free, in your browser.
Open the cookie cutter maker →Three ways to get a Christmas cookie cutter
December is the one month when everyone wants the same handful of shapes, and the second month when everyone wants something nobody sells: the family dog, a name, the house you live in. A 3D printer covers both, and the route depends on what you want to cut.
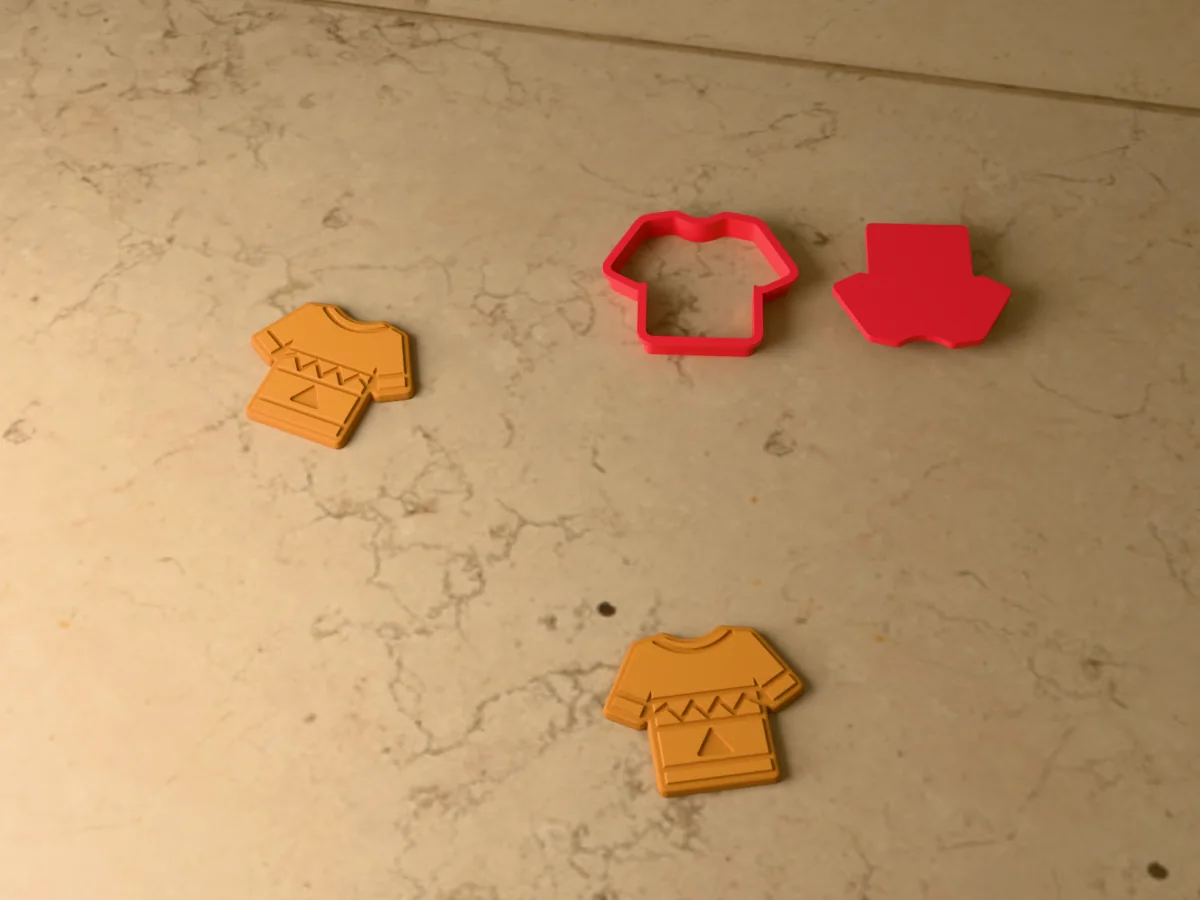
- A classic shape, ready to print. The free design library has single cutters for a Christmas tree, star, gingerbread man, snowflake, mitten, snowman, candy cane and an ugly Christmas sweater, plus whole sets such as the Nordic Christmas set and the Christmas village set. All of them are in the Christmas collection.
- Your own silhouette. Upload a PNG, JPG or SVG to the cookie cutter generator and it traces the outline into a blade, a stiffening rib and a flat top you press on.
- A name or a greeting. Switch the source to Text and type it. You get an outline cutter around the whole word and a stamp that presses the letters in.
The rest of this guide is about the second and third routes, plus the print and hygiene rules that apply to all three. The tool itself is covered in more depth in the general custom cookie cutter guide.
Step by step: a Christmas cutter from a silhouette
Start from a clean, solid shape
The tracer looks for one closed silhouette, so a solid black shape on a white background works best. A child's drawing of a reindeer works too, as long as the lines are thick: thin pen strokes break into lots of tiny cutters. An SVG is used as real vector paths and stays crisp at any size.
Check what the tracer saw
Two thumbnails show the black-and-white mask and the traced outline. If a branch of the tree is missing, move the detection threshold or press Auto. Outline smoothing (0 to 3 mm) rounds off jagged edges from a photo or a low-resolution image. If the cutter follows the background instead of the shape, tick Invert colors. Rotate and Mirror turn the outline without re-uploading.
Set the size
The size slider sets the longest side of the cutter, 80 mm by default. The generator warns you when a part of the outline comes out too thin for a cookie: anything narrower than about 6 mm on the cookie, such as a snowflake branch or an antler, tends to burn before the rest is baked and snaps off when you lift it.
Add a stamp if the shape has detail
A cutter only cuts an outline. For a sweater pattern, a face or buttons, tick Generate stamp: a separate flat piece with the inner detail raised on it, sized to fit inside the cutter. Or tick Cut detail into cutter to turn inner lines into extra blades joined to the outer one, which keeps it to one part.
Download, print, bake
Download the STL (one body) or the 3MF. It opens in the slicer flat top down, cutting edge up, ready to print with no supports.
Custom name cookie cutters and Christmas cookie stamps
Name cookies are the most requested custom cutter of the season: one per guest at Christmas dinner, a child's name for the cookie plate left out on Christmas Eve, a short "Noel" or "Joy" for a gift tin. In the generator, switch the source to Text:
- Type up to 40 characters: a name, an initial or a short phrase.
- Pick one of 15 fonts. The bold display faces (Bold Playful, Bold Poster, Comic Punch) press in far more clearly than the thin scripts.
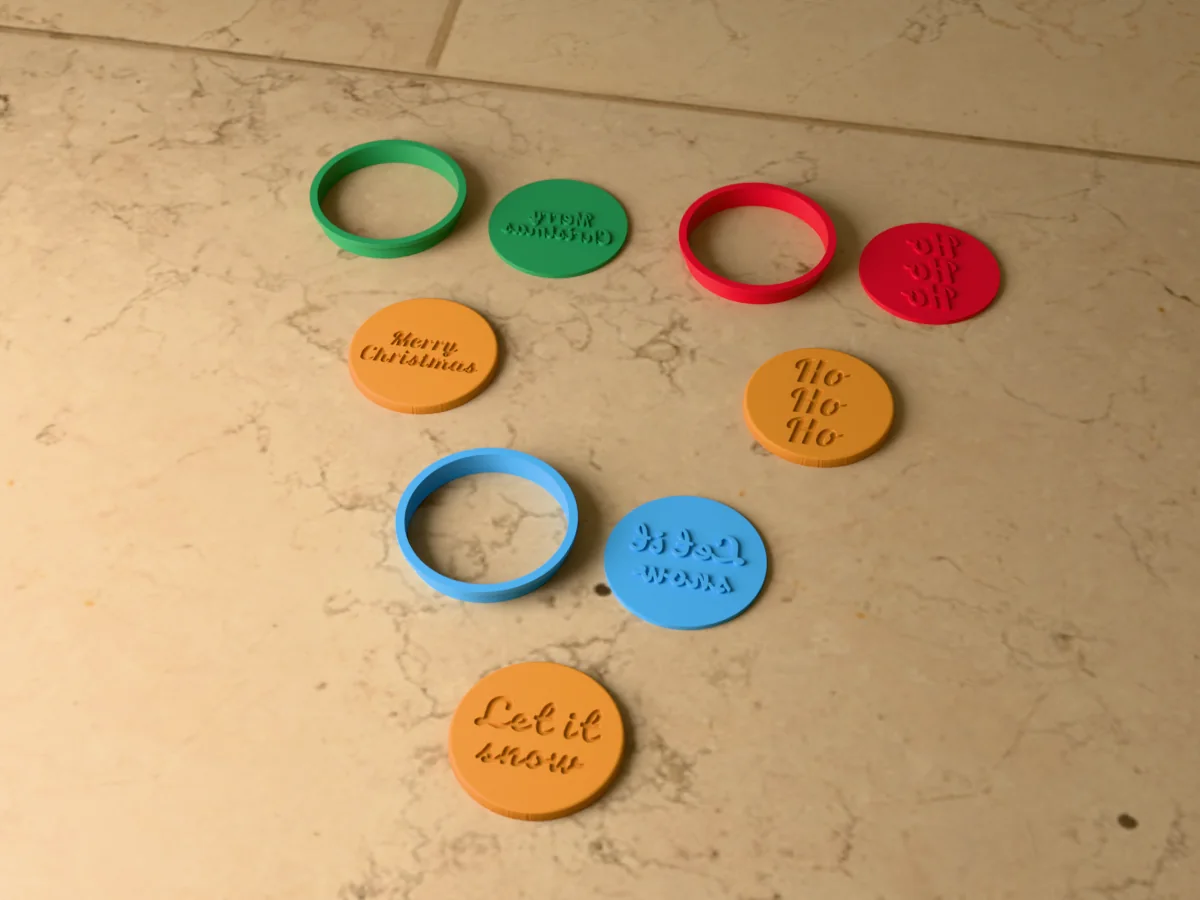
- The outer cutter becomes a rounded outline around the whole word, and every letter comes along as a stamp you press into the cut cookie. One download, cut shape and lettering together.
The stamp's detail depth (0.5 to 3 mm, 1.5 mm by default) sets how deep the letters press, and the base thickness (1 to 8 mm, 3 mm by default) how stiff the backing is. Print the stamp flat side down, then flip it over and press the patterned face into the dough inside the cutter.
Want a greeting without designing it? The library has ready Merry Christmas, Ho Ho Ho and Let it snow stamps, each with its round cutter, or all three as the Christmas cookie stamp set.
Which Christmas shapes cut cleanly
Dough is soft, the oven spreads it, and the blade is only as fine as your nozzle. Chunky silhouettes win. Here is how the usual Christmas shapes behave:
| Shape | How it cuts | Tip |
|---|---|---|
| Christmas tree | Easy | Keep the tiers' tips rounded; a sharp point burns first |
| Star | Easy | Five fat points beat eight thin ones |
| Gingerbread man | Easy | Make him 90 to 100 mm so arms and legs stay thick; add a stamp for the face |
| Mitten, stocking, bell | Easy | The classic beginner shapes, nothing thin to snap |
| Snowflake | Hard | Print it big; small branches break off in the dough |
| Reindeer | Hard | Antlers are the weak point; thicken them in the source image |
| Candy cane | Medium | The hook is narrow; 60 mm or more |
| Name or word | Medium | Use Text mode, a bold font and a stamp, not a cutter in the shape of each letter |
Size, blade and print settings
The defaults are built for rolled cookie dough. Change them under Advanced settings only when you have a reason:
- Blade height 14 mm by default (6 to 25 mm). It only has to be taller than the dough is thick.
- Blade thickness 0.8 mm by default, two lines of a 0.4 mm nozzle. Go towards 0.6 mm for a crisper cut, up to 1 to 1.5 mm for a cutter the kids will lean on.
- Top rim 4 mm by default (0 to 10 mm), the flat flange your palm pushes on.
| Setting | Use | Why |
|---|---|---|
| Material | PLA or PETG | Both are stiff enough; PETG tolerates warmer washing water |
| Layer height | 0.16 to 0.2 mm | Clean edge without a long print |
| Walls | 2 to 3 perimeters | The blade is all perimeter, so this is its strength |
| Thin walls / Arachne | On | Otherwise the slicer can drop a blade thinner than the nozzle |
| Infill | 10 to 15% | The rib stiffens the cutter, infill only adds time |
| Supports | None | Flat top on the bed, cutting edge up |
For reference, the library's tree cutter takes about 48 minutes and 8 g, the star 42 minutes and 7 g, the gingerbread man about an hour and 10 g. A full six-shape set with stamps is closer to 14 hours, so start early or spread it over a few evenings.
Food safety, honestly
A printed cutter touches cool dough for a second, and the cookie is then baked. That is a far lower risk than a mold food sets inside. The real issue is the layer lines: tiny grooves that can hold dough and bacteria if the cutter sits dirty.
- Wash it by hand in warm soapy water straight after baking, and dry it fully.
- No dishwasher for PLA. It starts to soften around 60 °C and warps. PETG copes better, but hand washing is still kinder to any print.
- Treat cutters as seasonal: at a few cents each, reprinting next December beats scrubbing a scratched one.
- Do not use a printed cutter to store or shape food that sits in it, and do not bake it in the oven with the dough.
The longer version, for every printed kitchen tool, is in are 3D printed molds food safe.
Gingerbread house cutters
A gingerbread house is just four cutters: two gables, a side wall and a roof panel. The gingerbread house kit cookie cutter set cuts the door and windows in the same press, so every panel matches. For a single house-shaped cookie, there is a gingerbread house cutter on its own. And if you want a house that never goes stale, print one instead: 3D printed gingerbread house.
Free Christmas cookie cutters
All Christmas designs →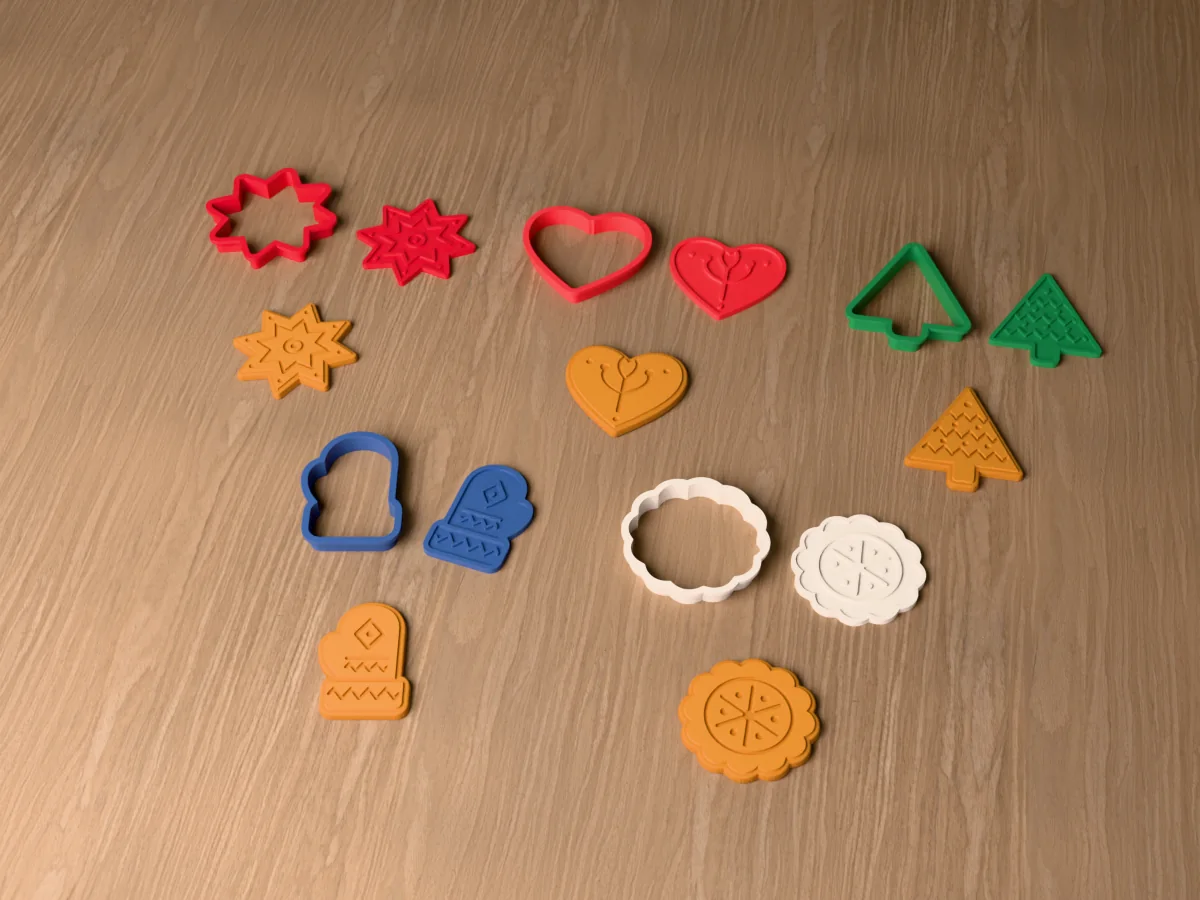
Problems
A snowflake branch or antler broke off the cookie
Cause The part is narrower than about 6 mm on the cookie. It bakes faster than the rest and snaps when lifted.
Fix Make the cutter bigger, thicken the thin parts in the source image, or pick a chunkier shape. The generator's thin-part warning tells you before you print.
Dough sticks inside the cutter
Cause Warm dough gripping the printed inner face.
Fix Chill the rolled dough, dip the cutter in flour between cuts, and sand the inner face of the blade lightly once. If a shape keeps sticking, lower the blade height.
The stamped letters or pattern are faint after baking
Cause The dough rose and filled the imprint, or the detail is too shallow.
Fix Use a dough that holds its shape (less baking powder), chill the stamped cookies before baking, and raise the stamp's detail depth towards 2 to 3 mm.
The blade has gaps in the slicer preview
Cause The slicer drops walls thinner than the nozzle.
Fix Turn on thin-wall detection (Arachne in PrusaSlicer and OrcaSlicer, "Print thin walls" in Cura), or raise the blade thickness to 1 mm and download again.
FAQ
Is PLA food safe for Christmas cookie cutters?
Treat a printed cutter as a short-contact tool, which is what it is: it touches cool dough for a second and the dough is then baked. The weak point is the layer lines, which can hold dough and bacteria, so wash it by hand in warm water straight after use, dry it fully, keep it out of the dishwasher, and reprint it next season rather than keeping it for years.
How deep should a 3D printed cookie cutter be?
The generator's blade height is 14 mm by default, which clears rolled sugar cookie and gingerbread dough with room to spare. The setting goes from 6 to 25 mm. It only has to be taller than the dough is thick; a taller blade grips the dough more and uses more filament.
Can I put a 3D printed cookie cutter in the dishwasher?
Not a PLA one. PLA starts to soften around 60 °C and a dishwasher cycle warps it. PETG copes with warmer water, but hand washing in warm soapy water is still the better habit for any printed cutter.
How do I make a cookie cutter with a name on it?
Switch the cookie cutter generator's source from Image to Text and type the name, up to 40 characters. The outer blade traces a rounded outline around the whole word and the letters become a stamp you press into the cookie after cutting. Pick a bold font so the letters press in clearly.
What size should a Christmas cookie cutter be?
Around 80 mm, the generator's default, is a normal cookie. Go to 40 to 50 mm for small cookies you hang on the tree or put on a plate in numbers, and 100 mm or more for a centrepiece gingerbread man. Shapes with thin arms, like snowflakes and reindeer, need the bigger sizes so the arms stay at least about 6 mm wide on the cookie.
How long does it take to print a cookie cutter?
A plain 80 mm cutter takes roughly 40 minutes to an hour and 6 to 10 g of PLA, a few cents of filament. A cutter with its own stamp is two parts and takes about twice as long.
Made by meshcast.app. Baked something with one? Send a photo, we'd love to see it.